My first adventure game prototype is an ARKit-based app designed to explore the following:
- ARKit plane detection and the automatic insertion of models once suitable planes have been detected (as opposed to user-initiated placement)
- 3D modelling workflows between Blender and Xcode
- Map searches for generic locations and then, using the results, managing distance, accessibility, storage, and game state
- Geofencing triggers and how they might progress the game
ARKit plane detection
Using Apple’s comprehensive sample code, I went through and stole all of the important elements that were used in detecting planes and placing elements correctly.
The sample code is daunting, especially if one is as unfamiliar with 3D work as I am, but one thing I found was important was that it takes into account adjustments made in the SceneKit object editor.
Other tutorials I found ignored these adjustments and placed the centre of the object at the hit test result. This is rarely what is wanted when it comes to horizontal planes—most of the time, the base of the object should be placed at the hit test result in order to give the appearance that it’s standing in the world.
I think the important property on the SCNNode object is simdTransform (not the standard transform property), although a lot of this is confusing to me and the docs are less than complete.
Clearly, it will take time to fully understand the subtleties of ARKit and I’ll need to take this learning time into account when considering which game development path to go down.
Adding Characters
Apple’s sample app requires user interaction to add objects to a scene, whereas I wanted the app to automatically add an object when a plane was detected, as if a character had just appeared.
This involved setting up the ARKit session to track planes (the default configuration does not do this):
    let configuration = ARWorldTrackingConfiguration()
    configuration.planeDetection = [.horizontal]
    sceneView.session.run(configuration, options: [.resetTracking, .removeExistingAnchors])
When a plane is discovered, an ARPlaneAnchor is created and the delegate is notified that a node representing this anchor has been added to the scene.
This was a good place to react to plane discovery, and is where I set the model to appear.
func renderer(_ renderer: SCNSceneRenderer, didAdd node: SCNNode, for anchor: ARAnchor) {
    guard let planeAnchor = anchor as? ARPlaneAnchor, currentDialog.count == 0 else { return }
    DispatchQueue.main.async {

        // For prototyping only. Do not handle real game state this way. =)
        var model : String?
        switch self.manager.state {
        case .start:
            model = "red"
        case .seenRed:
            // Only appear if we're at a coffee shop
            if self.manager.inLocation {
                model = "blue"
            }
        case .seenBlue:
            model = "red"
        default:
            break
        }
        if let hasModel = model {

            // Load a model from the cache
            self.selectedObject = self.objectManager.loadedObjects.first() { $0.modelName == hasModel }

            // If that was successful, place it in the scene
            if let hasObject = self.selectedObject {
                self.placeVirtualObject(hasObject)
            }

            // Set the character to talking
            self.startDialog()
        }
    }
}
After the character appears, it runs through some dialogue and then removes itself from the scene and updates the game state.
The state was tracked with an enum that was attached to a GameManager object, then saved as an integer in NSUserDefaults and loaded when the object was initialised.
To save time, all of the dialogue was hardcoded as arrays of strings in this manager class.
3D Modelling Workflows
I created a couple of models in Blender—some creepy cylinders with eyes—and exported them as .dae objects, a format SceneKit supports.
Unfortunately, Blender exports them as z-up (meaning the z-axis is the up/down axis and the y-axis is the depth axis) whereas SceneKit uses y-up (the y-axis is the up/down axis and the z-axis is the depth axis).
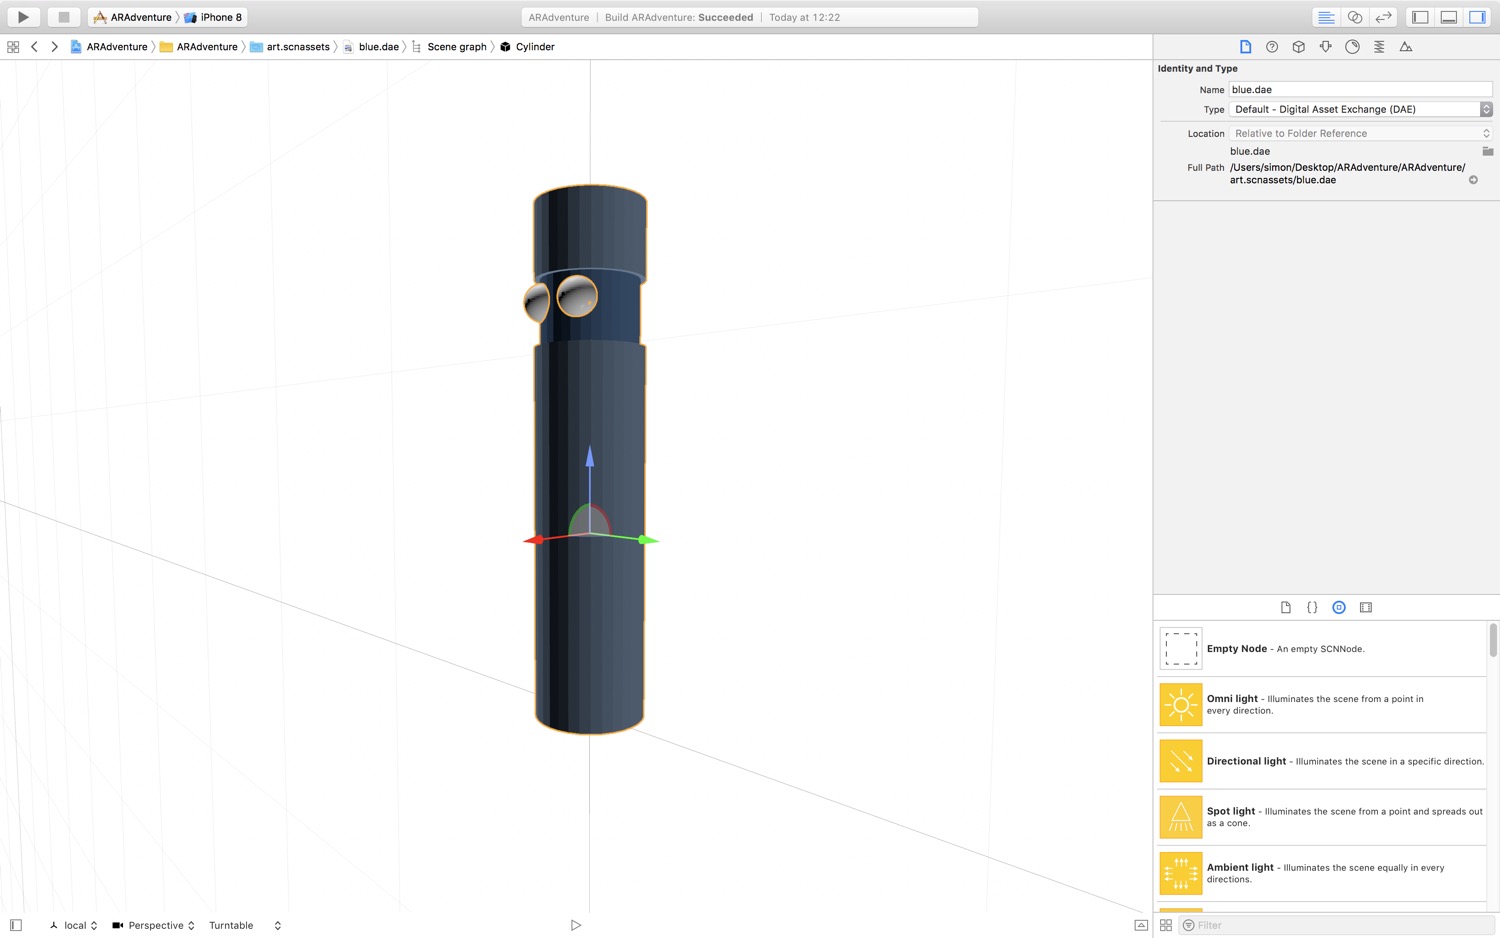
This didn’t matter in practice. The major issue was that, when viewing the object in the SceneKit Editor, the plane is vertical rather than horizontal and any adjustments to the y-axis in the ARKit view had to instead be made on the z-axis in the SceneKit editor.
Since I wanted to be able to export directly from Blender into the .scnassets folder and have Xcode pick up the changes automatically anyway (which seems to work just fine), it wasn’t a huge problem—any adjustments were made in Blender and the models re-exported.
Map Searches for Generic Locations
After the first character appears, it starts a lookup for the user’s location. When the user is found, an MKLocalSearch for “Coffee Shops” within an ~7 mile radius of their location is started.
func locationManager(_ manager: CLLocationManager, didUpdateLocations locations: [CLLocation]) {

    let request = MKLocalSearchRequest()
    request.naturalLanguageQuery = "Coffee Shops"

    // 0.1 degrees ~= 6.9 miles
    request.region = MKCoordinateRegion(center: locations.first!.coordinate, span:MKCoordinateSpan(latitudeDelta: 0.1, longitudeDelta: 0.1))

    let search = MKLocalSearch(request: request )

    search.start { (response, error) in
        guard let hasItems = response?.mapItems, CLLocationManager.isMonitoringAvailable(for: CLCircularRegion.self) else {
            print("No items found, or monitoring not available")
            return
        }

        // Respond to the results

    }
}
The results of this search are added as geofenced notification objects and as regional triggers to the location manger:
// For this prototype, clear out any previous searches
UNUserNotificationCenter.current().removeAllPendingNotificationRequests()
for item in hasItems {
if let hasRegion = item.placemark.region {
hasRegion.notifyOnEntry = true
hasRegion.notifyOnExit = false
// Add to location manager for in-app response to entering regions
self.locationManager.startMonitoring(for: hasRegion)
// Add to notifications for background response to entering regions
let trigger = UNLocationNotificationTrigger(region: hasRegion, repeats: false)
let content = UNMutableNotificationContent()
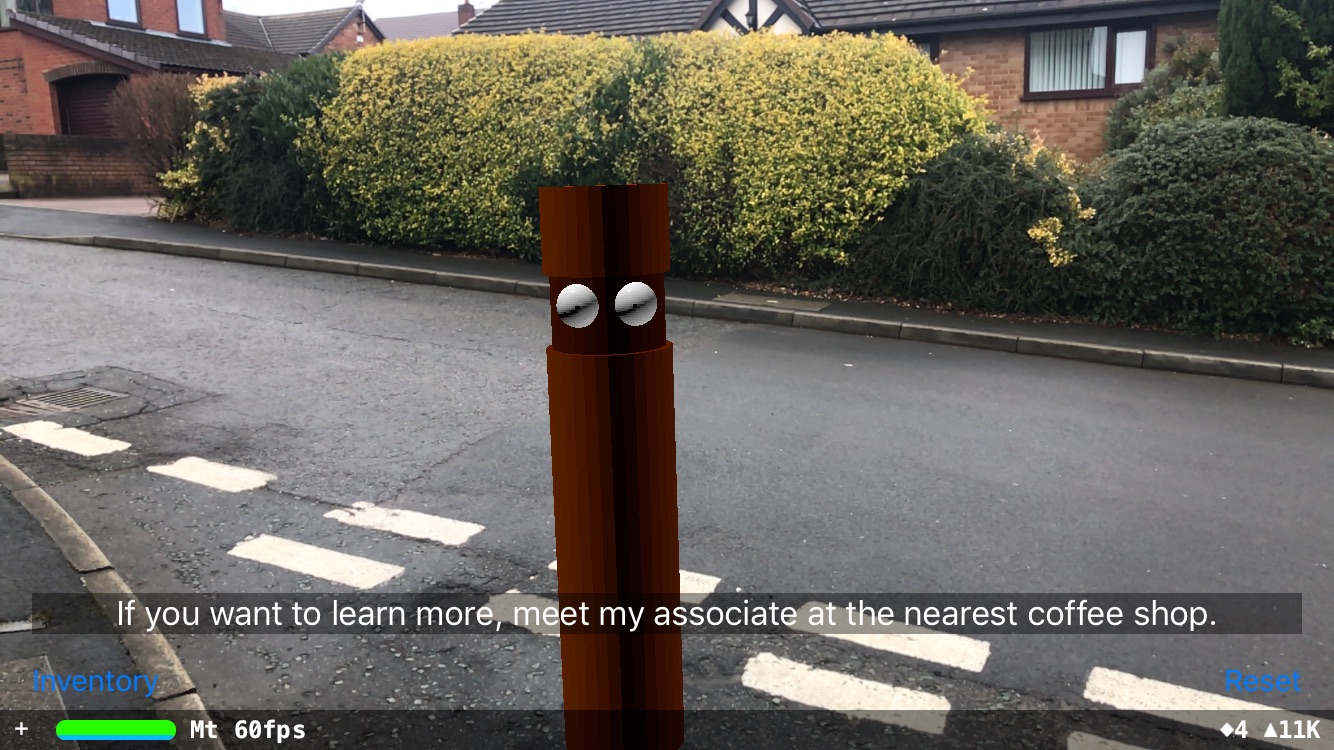
content.body = "Blue is nearby! Meet him at \(item.name!)"
let note = UNNotificationRequest(identifier: hasRegion.identifier, content: content, trigger: trigger)
UNUserNotificationCenter.current().add( note, withCompletionHandler: { (error) in
if let hasError = error {
print("Error adding notification: \(hasError.localizedDescription)")
}
})
}
}
Geofencing Triggers
When the app detects a coffee shop is nearby and the user is not in the app, it will notify the user that the next character is ready to meet them.

Opening the app will start a new ARKit session and, when the first plane is detected, the character will appear and give the player more instructions (and an inventory item).
Limitations and Challenges
The prototype was a success! I was able to do everything that I wanted to do and there is a clear path from prototype to full game. However, just because the path is clear does not mean it is easy:
- As evidenced by my incomplete understanding of Apple’s sample code, getting up to speed with ARKit will take some time
- Geofencing is limited to 20 locations per app, making handling multiple story threads at multiple different location types tricky
- In order for it to be a more immersive AR experience the characters would ideally support voice acting and lip syncing, which gets hard and expensive fast
- There are a lot of edge cases with the AR, for example right now the app doesn’t take into account the y-transform of any detected horizontal planes, meaning that it’s very easy for characters to appear on tables, chairs, or kitchen surfaces
- There are also a lot of edge cases and some ethical concerns with the geofencing too—what if the user is somewhere rural without significant landmarks or generic locations nearby? What if they can’t get out to visit any of the locations but they still want to continue playing? What if a the app causes a user to visit somewhere problematic by accident?
I’m excited about the possibilities that ARKit has when it comes to creating more immersive adventure games but the amount of work to create something of substance is daunting, especially by myself.
Still, it was a lot of fun building the prototype and ARKit is as easy to learn and user-friendly as something incorporating such complex and cutting-edge technologies could be.