As my workday leans more towards asset generation rather than straight coding, I’ve started looking at different tools available for creating and animating characters.
The art style I’m aiming for in my games is cartoony but won’t be pixel art so, while there are many great (and often free or low-cost) pixel art animation tools, I won’t be discussing them here.

Alternatives to Adobe
I already have a Creative Cloud subscription but I often find Adobe frustrating—they can’t keep their keyboard shortcuts consistent between apps, let alone consistent with the entire OS. It bugs me no end that their apps are non-native, meaning that basic OS-level features (like full screen on macOS) are missing.
Their apps are undeniably powerful and full-featured, however, and they are standard in many industries which makes them useful to know.
As they’re already part of many of my existing workflows, for something to tempt me away it really would have to be mind-blowing.
Spine
Spine is a sprite animation app entirely focused on game development. Instead of creating individual animation frames, it creates a custom data format that can be read in by its runtimes (available for many popular game engines) which transforms the individual parts of an image to create the animation. This results in much, much smaller game bundles and memory requirements and the results look undeniably slick.
They offer two prices: a reasonable $69 for a the standard version, but for mesh warping and IK support I’m looking at the Pro version which is $299.
It’s worth noting that After Effects has support for both of these features already, although IK requires the incredible and yet somehow free Duik plugin (this amazing plugin does have a Patreon page and I am now a patron because it is that good).
Also, while Spine’s website states that it runs on a Mac, any app that tells you to disable Gatekeeper then has two additional questions about crashing on macOS whose solutions are “don’t use these other products” cannot, in good conscience, claim to support macOS.
I can foresee a frustrating time either using a crash-prone, unprotected product directly on a Mac, or having to reboot into Windows every time I want to animate.
I’m pretty sure I don’t want to pay $299 for either of those experiences.
Toon Boom Harmony
Within the animation industry, Toon Boom Harmony is the standard. It comes in three forms, but the cheaper Essentials offers much less than Adobe Animate CC/After Effects (e.g. vector-only animation, no pressure sensitivity, no animated masks), and the Advanced version starts at $38 a month.
And for the kind of puppet warp capabilities that After Effects offers out of the box, I’d need the Premium version at $73 a month.
You do get a lot for that money—capabilities from Photoshop, Illustrator, and After Effects all rolled into a single app—but it doesn’t replace enough for me to completely cancel my CC subscription and so an additional $73 a month is a big ask.
There are a lot of videos from animators on YouTube that either use Toon Boom Harmony themselves or suggest using it but it’s worth bearing in mind that this is a specialised, commercial tool aimed at animation companies. It’s maybe worth it if you’re trying to get a job as a professional animator but, after watching this video by Scribble Kibble, I’ve decided that’s probably not me.
Pencil 2D
Pencil 2D is a cross-platform, open source animation tool. It has limited tools and no character rigging but it does support both raster and vector graphics and has a straightforward timeline.
A good option for very basic animations but I want something more robust.
Synfig
Synfig is another open source animation tool that has many more features than Pencil 2D, including bones and deformations.
It looks like a really solid app, and, as it’s pay-what-you-want, the price really can’t be beat.
However, it’s even less native on macOS than Adobe’s apps (undo is ctrl z, not cmd z), and the UI doesn’t look the best on a Retina screen.
Blender
Blender is an amazing free 3D design tool. Using textures or the grease pencil, it can be forced into service for creating 2D animations but it’s really not designed for that.
This looks set to change with the massively expanded grease pencil capabilities in version 2.8. However, this version is still in beta and is not set to be released for a while yet. There also aren’t a lot of resources for learning how to use Blender for 2D animations.
I love Blender and it is a great choice for doing 3D work, but I don’t think it’s a great choice for 2D animations when I have more specialised tools available.
The Adobe Workflow(s)
So I’m sticking with the devil I know.
Even this isn’t super straightforward, though, as Adobe has four different apps that can be used for animation and the workflows for these apps can be different depending on what I’m trying to do.
In order to clarify things, I’ve gone through and given a brief description of how the app works when it comes to animation and the pros and cons of each.
Photoshop
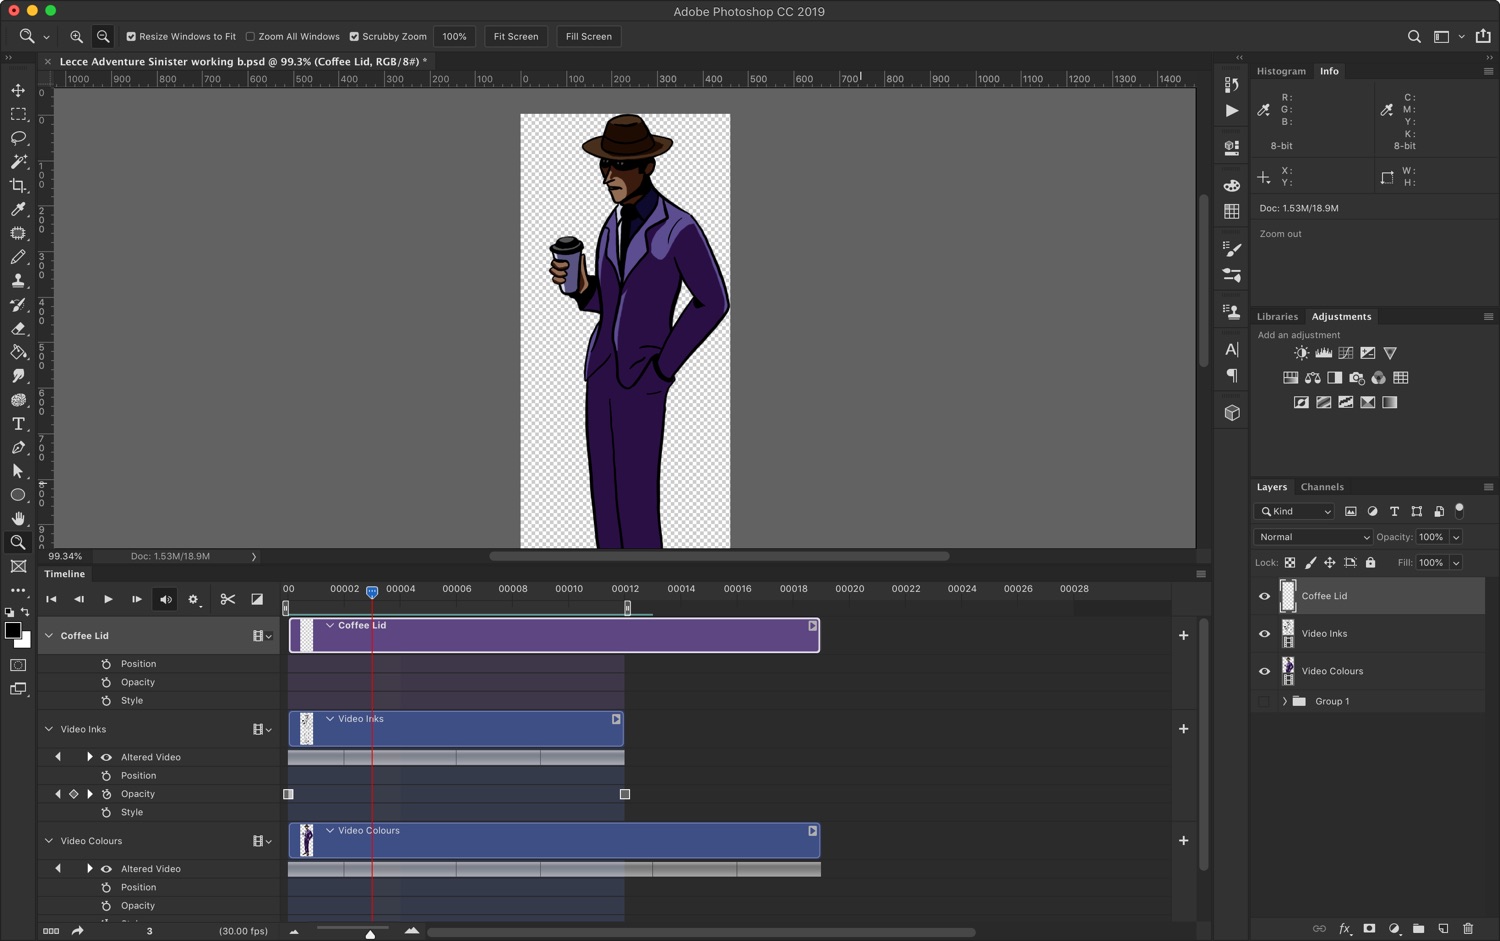
Animating with Photoshop is severely limited and favours a much more traditional, straight ahead approach. With no character rigging or keyframing, it favours using a reduced number of layers (maybe just a pencil, ink, and colour layer). It slows things down considerably to separate characters into individual parts, as one would for apps that use any sort of rigging.
This means that to use Photoshop as my primary animation app, I would be committing to this approach with no realistic option to change my mind and go the rigging route later.
It remains a fine drawing tool, however, and its file format can be imported directed into all of the other Adobe animation apps making it a useful starting point.
Pros
- Access to a bazillion brushes, layer styles, layer effects, clone tools…I mean, it’s Photoshop
- Different video layers allow for easy creation of static elements mixed in with frame by frame animation
- Onion skinning
- While immensely time consuming, nothing beats drawing each frame individually for adding the squash and stretch and anticipation that makes great animations sing
Cons
- Very basic timeline options
- In the timeline mode, the total animation time is fixed, so messing with the frame rate can result in deleted frames which is counter-intuitive and infuriating
- No keyframes, which means no tweening making even the most straightforward animations harder than they need to be
Good For
- Truly hand-crafted, frame-by-frame animations
- Animations that use a very unique style or look that require lots of custom brushes
- Stand-alone shorts where the artistry is the focus
- Turnarounds, character sheets, backgrounds
After Effects
After Effects is like Photoshop but where every effect and property can be animated over time. It is immensely powerful. It is also very confusing and its character animation tools can be limited, until you add the phenomenal (and free) Duik plugin.
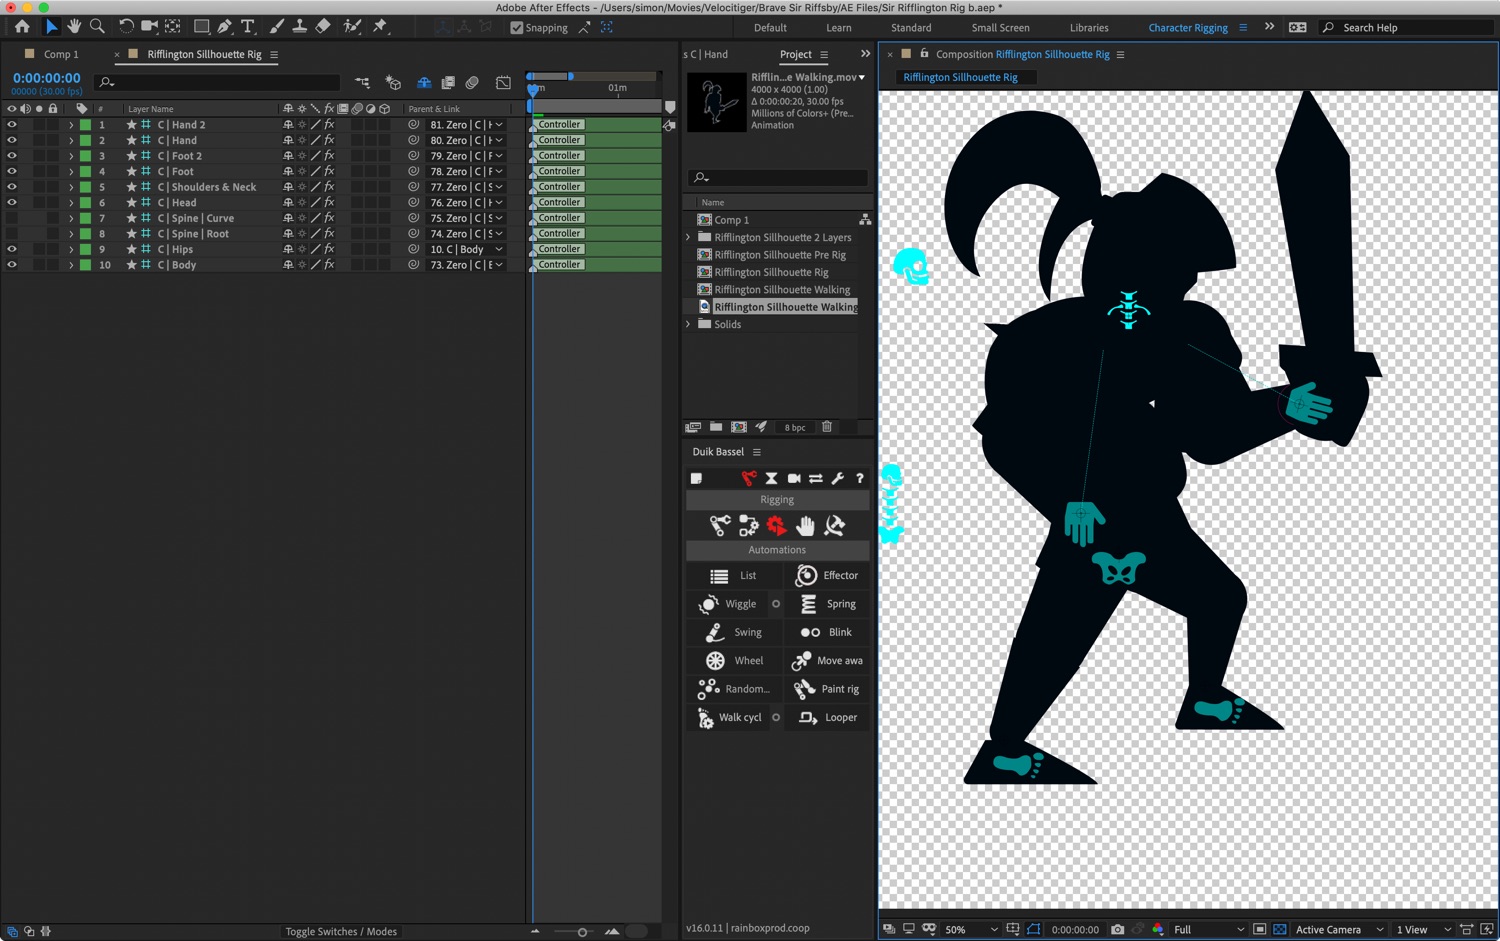
For character animation, it favours an approach where each limb and extremity should be on its own layer. Different compositions can be used for things like heads and hands and then combined to make powerful but manageable rigs.
Setting up rigs in After Effects compared to Animate or Character Animator is without a doubt complicated and confusing but, once it’s done, the level of control is incredible.
Pros
- The puppet tools have many options for pinning and stretching images and make creating rubber hose animations very easy
- The Duik plugin has a ton of options and adds IK, FK, joints, bones, and controllers, all of which can be keyframed
- Supports importing PSD files natively and supports limited updates to the underlying PSD (i.e. changing pixel content of individual layers works OK, changing layer order, adding, or removing layers can cause problems)
- It’s an industry standard motion effects tool, with extremely customisable additional tools like warps and transforms, not to mention text support, masks, and a ton of built-in effects all animatable down to the tiniest detail
- Once you understand most of the panels and embrace constantly changing workspaces, for all its power it’s quite manageable
Cons
- Setting up a nested composition and slider for things like mouth shapes can be fiddly and time consuming
- Limited built-in brush set useful for only the coarsest of changed
- Complicated application with a steep learning curve
- Complex rigs can make it very slow to render and work with
Good For
- Character animation using lossless raster formats
- Additional in-game animations and effects, like animated title text or looping background animations
- Creating cut scenes or other video footage, like promos or ads
- Control freaks who want to adjust every aspect of an animation
Adobe Character Animator
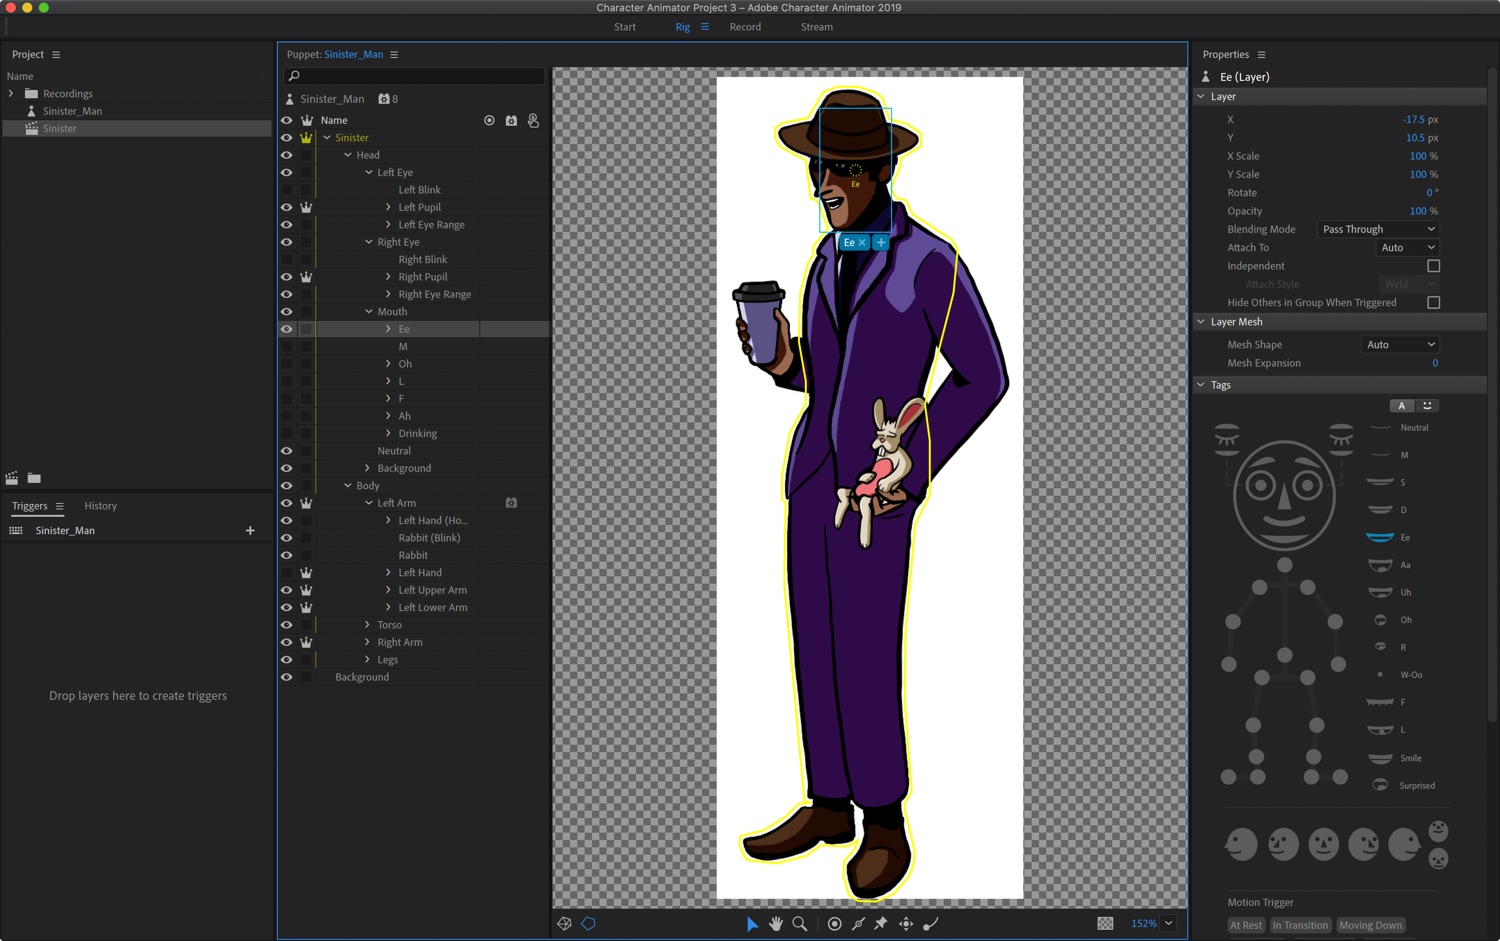
Character Animator has some powerful automated rigging and voice-activated lip-syncing technology. However, the way it’s set up is much more geared towards acting with puppets rather than drawing. It seems like it’s more for recording or streaming a performance rather than carefully producing a finished, hand-designed animation.
If I import a PSD or Illustrator file and it’s layered correctly (which, unfortunately, requires a different layer naming convention than what’s suitable for AE or Animate CC), the character will immediately start responding to my voice, expressions, and head movements.
Its first launch experience is very impressive, but after using it for a while I found that the timeline lacked the features of other Adobe products and frame by frame control of different aspects is either non-existent or extremely limited.
Pros
- Fast, powerful character rigging—with a correctly layered PSD or Illustrator file, it can basically be automatic
- Automatic lip-syncing based on audio and video input which is surprisingly effective
- Automatic walk cycles with a variety of adjustable parameters
Cons
- No keyframing
- Requires a very specific folder and naming structure to benefit from the rigging automation
- Very limited timeline editing makes it fiddly to pull out individual parts (e.g. a single loop of a walk cycle)
Good For
- Tightly lip-synced animations
- Performance videos, where you can act into a webcam and have the characters respond like a puppet in real time
Adobe Animate
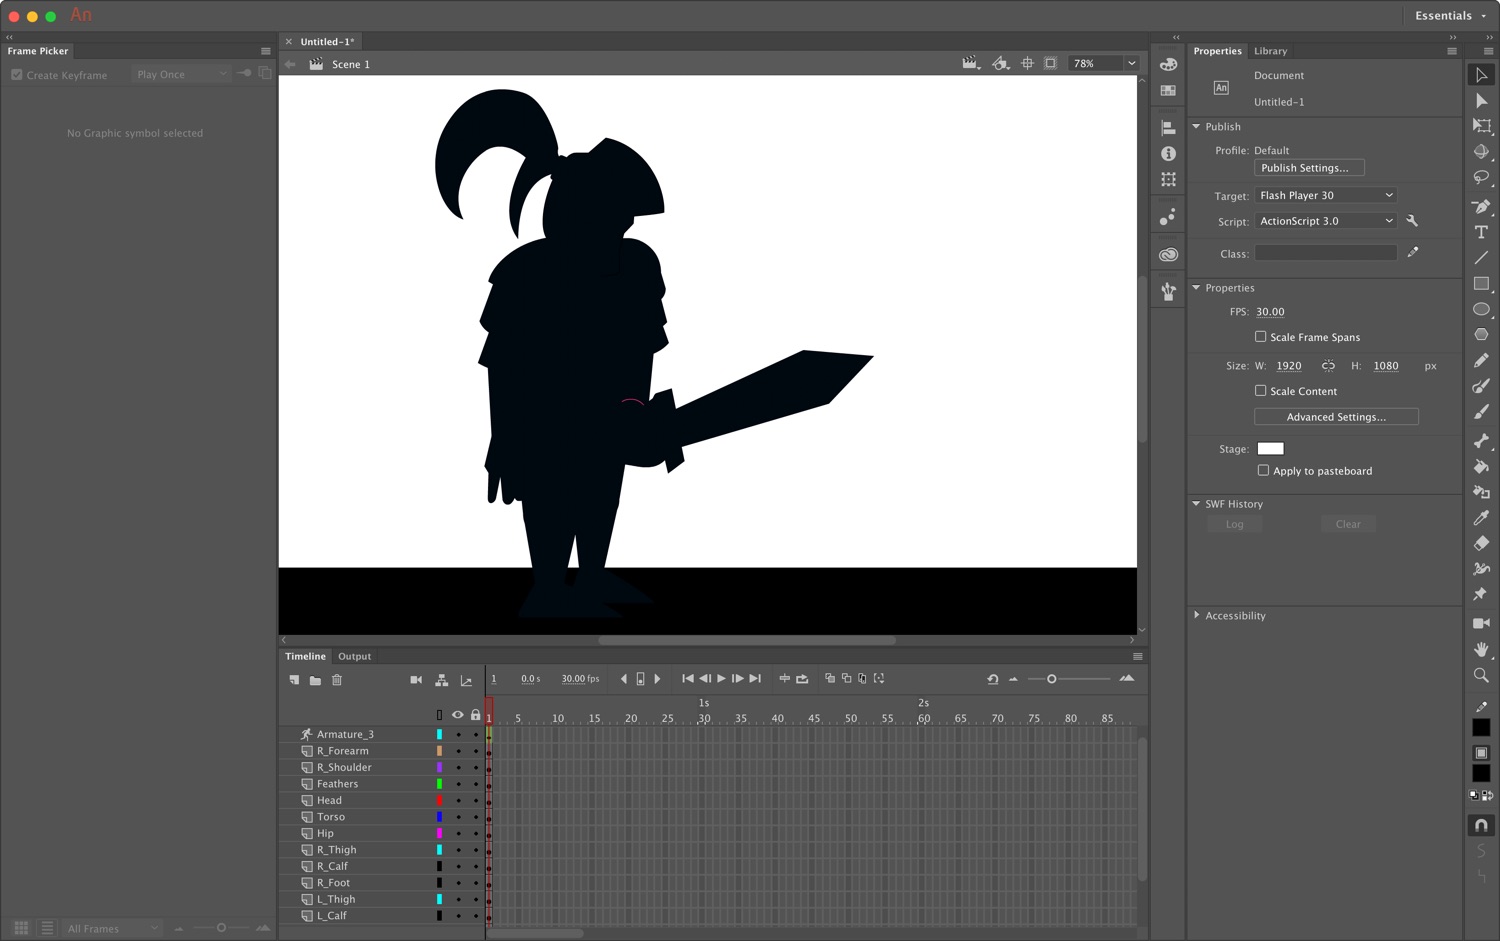
Adobe Animate (nee Flash) is a vector-based animation tool. It favours the same layer approach as After Effects and offers the same kind of timeline and keyframing, but it’s a lot less intimidating to get started with. It also has basic bone and IK support built in and, while not automatic like Character Animator, it is relatively quick to rig a character.
It lacks the depth of After Effects but, because of this, the learning curve is shallower.
Pros
- Easy to use bones makes it quick to set up a rig
- Graphic symbols with thumbnails make it easy to set up things like lip syncing or animating hands
- Powerful tweening and keyframing capabilities, including curve editing
- Fast, especially when previewing
- Paths and strokes can be animated, allowing for some very fluid motion
- The symbols functionality favours creating reusable assets making it even more useful for developing animated series
Cons
- Working with raster graphics is frustrating (e.g. it automatically applies lossy compression to imported lossless art)
- The vector-based tool favours a flatter illustration style (while support for vector brushes mitigates this somewhat, the more complex the brush is the slower everything gets)
- UI is inconsistent with other Adobe apps, which can be frustrating especially if you’re switching between them a lot
Good For
- Animated shorts, especially ones featuring the same character
- Animations with a vector/flat shaded art style
My Choice
My characters can definitely work with a flat shaded style, but I created them in Procreate with a particular brush that has some texture to it which I’d like to maintain.
I don’t think Character Animator is practical for games production (one day, with some control over keyframes, it could be) and it doesn’t make sense to use Photoshop when there are much more powerful tools available.
As both After Effects and Animate work with a similar layer set up, I’m going to try to create one character in each. I like the ease and speed of Animate but the way it handles importing lossless PNGs is irritating. I really wish it would ditch its web animation legacy and go for quality over file size.
On the other hand, I know what After Effects is capable of but it would be all too easy to get stuck in the weeds tweaking every tiny setting to get that perfect toe bend that no one will notice when it’s actually scaled down and running in my game.
So I’ll try both and see which one suits me more.
Your Choice
If you have a Creative Cloud subscription, I would suggest ignoring any pressure to move to Toon Boom Harmony and just get started with what you have. The core skills required are ultimately going to be the same—learning a new tool is a lot easier than learning how to produce good animations.
Having said that, if I wasn’t already part of the Adobe ecosystem then I would certainly be looking at Toon Boom Harmony.
Of course, if the reason you’re not part of the Adobe ecosystem is that you’re put off by or can’t afford their subscription pricing, then Toon Boom’s even more expensive subscription pricing will in all likelihood also put you off. You could buy it outright, but the Premium version comes in at an eye-watering $1,975.
In which case, despite the lack of detailed tutorials, Synfig is a solid open source option.