In my initial prototype I used SKActions exclusively to handle movement. It’s a fire and forget solution—I create an action with a destination point and a duration and run that action on a sprite. SpriteKit will move that sprite to the given point over the given time without me having to think about it again.
let moveAction = SKAction.moveTo(x: hasTarget, duration: length / moveSpeedInPointsPerSecond)
sprite.run(moveAction)
It’s great for many situations. However, there are a few limitations:
Scaling
While it’s possible to have an action that, say, scales a sprite down as it moves further into the scene, that scaling action does not cause the velocity to decrease by the scale factor. This gives the impression that the sprite moves faster as it gets smaller.
While not super noticeable, for scenes that have very deep perspective (e.g. facing down a long alleyway) it can make something feel a bit off.
Pathfinding
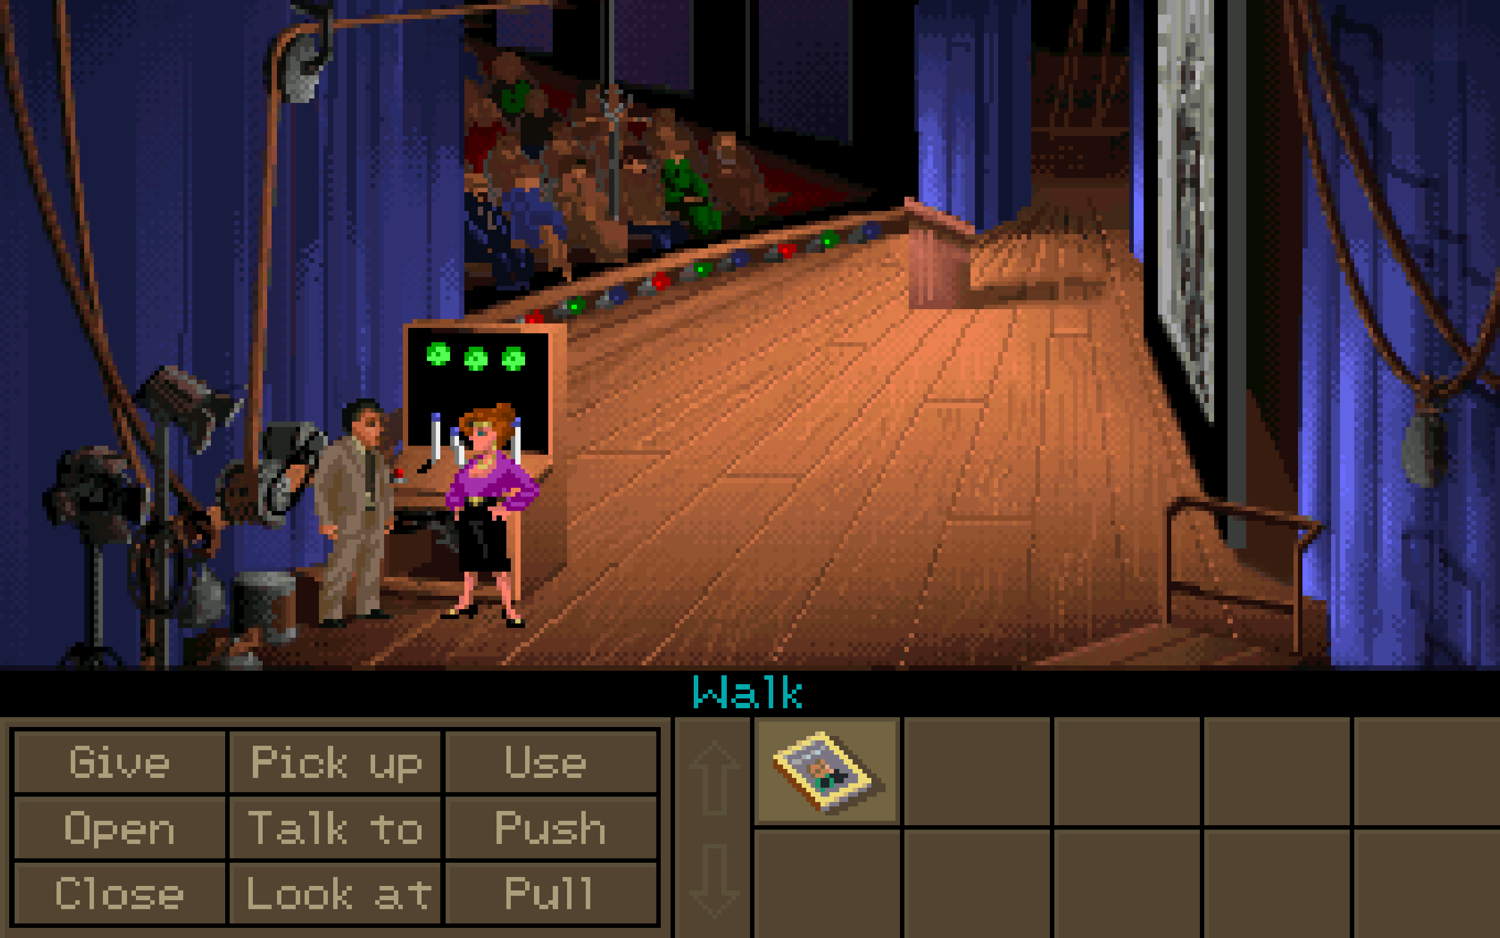
Adventure games tend to have limited movement spaces within their scenes.
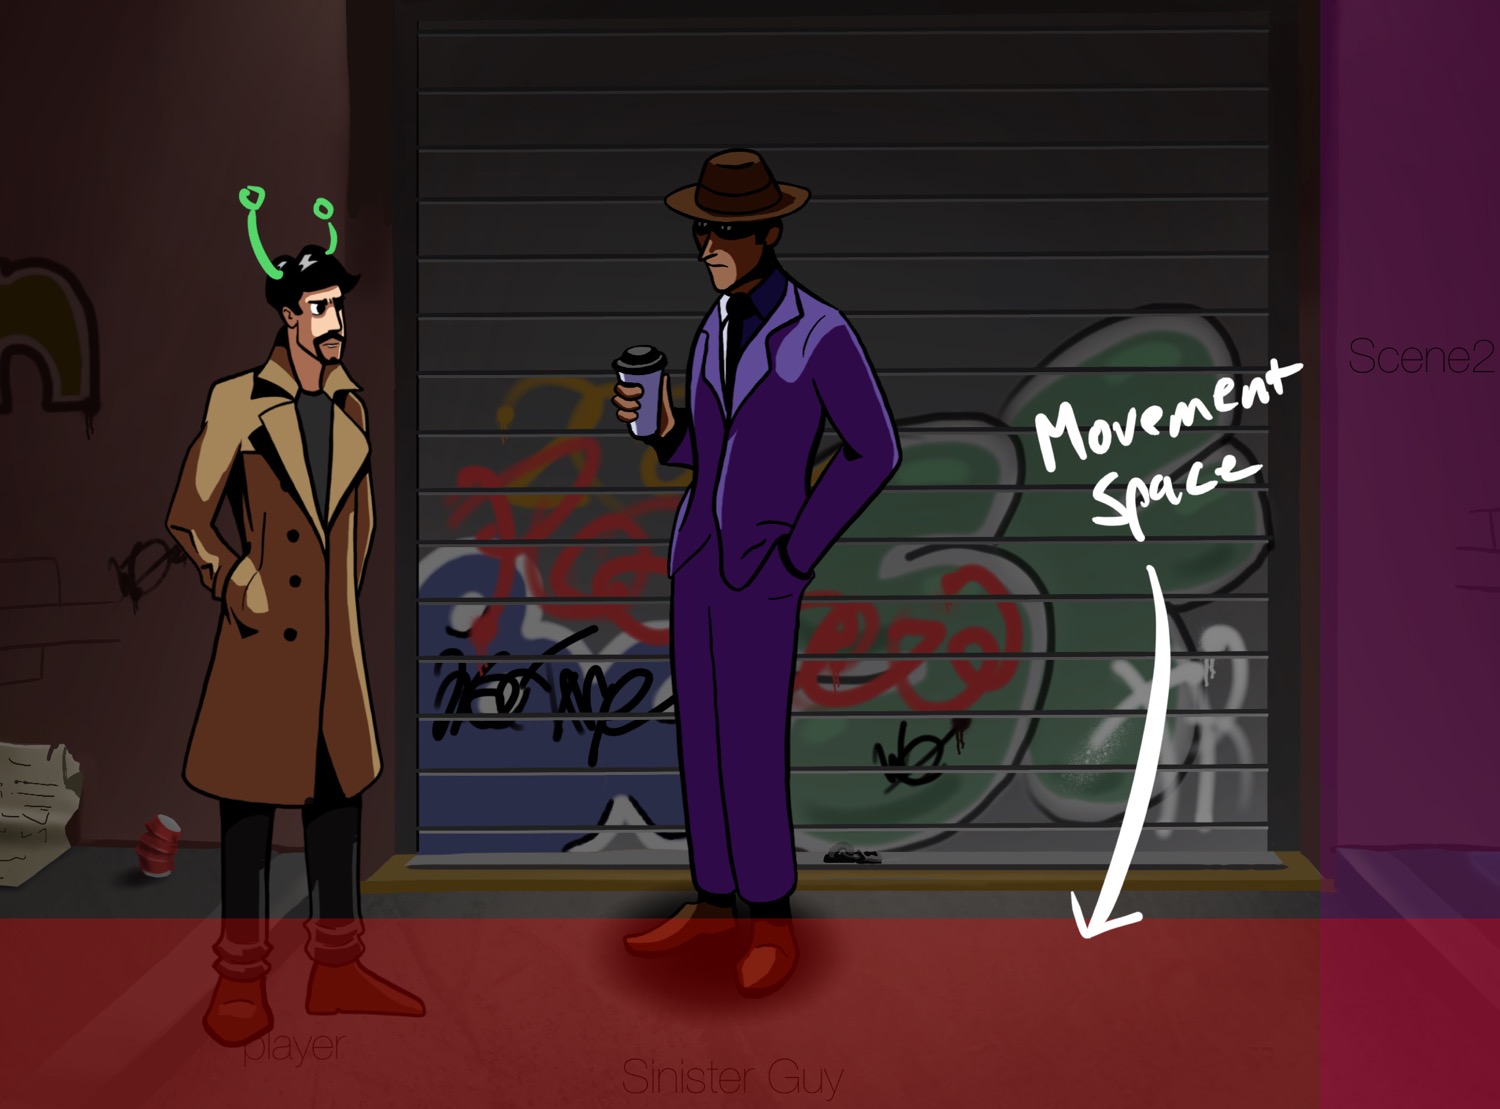
However, you don’t want to restrict where the player taps or clicks to only these spaces—they should be able to tap anywhere on the screen and have the player sprite react appropriately.
In the above scene, for example, tapping above the garage door should cause the player to walk up to the bottom of the door, then maybe look up at it before commenting on it.
However, because the sinister guy in the purple suit is standing there, we’d want the player to avoid them realistically, not just walk through them like they weren’t there.
This requires a lot more smarts than SKActions are currently able to offer.
The next two posts in this three-part series about movement will deal with implementing scaling and pathfinding, but first I have to re-implement all the basic movement that SKActions gave me for free.
A Brief Aside About Components
I am using the Entity Component System to develop AdventureKit.
- An Entity is a ‘thing’ in your game (player character, non-player characters, objects, even backgrounds and exits).
- A Component describes something that the Entity has or does.
- A System is how those Components interact.
For adventure games, the Player character would have the following Components:
- Sprite Component: holds the sprite node and causes the player to appear on screen
- Animation Component: holds all of the animation states and frames
- Movement Component: moves things around the screen
- Dialogue Component: allows things to talk
- Interaction Component: handles player interaction
Whereas an item that a player picks up might have:
- Sprite Component: holds the sprite node and causes the object to appear on screen
- Item Component: information about what the item can do (e.g. who or what it can interact with)
If the player tapped on an item on screen, the Systems would get the touch information from the Interaction Component, then co-ordinate the Animation, Movement, Sprite, and Item Components to make the player character move to the item and pick it up.
The Movement Component
I’ll be writing about the other components as I develop them, but right now the focus is on the Movement Component.
For AdentureKit 1.0, only the player will move. However, by developing a generic Movement Component (rather than writing move code that is specific to just the player), I’ll have something that can apply to many situations (even potentially beyond just adventure games).
In future versions, adding movement to non-player characters becomes that much easier—all of the pathfinding and scaling will already be done. More interestingly, it’s not limited to characters. If I have a game set in a train yard and want non-interactive train objects moving in the background, then I can create a train object and add a Movement Component to it. Or, if I write an adventure game story with a poltergeist, by adding a Movement Component to an item, I can easily make objects move spookily around the scene.
Handling Manual Movement
When a tap or a click is detected, the Movement Component of the player sprite is passed the destination point.
func move(to target : CGPoint ) {
    self.target = target
}
(The reason for having a method for this, as opposed to directly setting the target property, will become apparent in parts two and three).
Then, on each frame, I do the following:
First, I check to see if I have a target. If I don’t, then the sprite has nowhere to go.
override func update(deltaTime seconds: TimeInterval) {
    guard let hasTarget = target else {
        return
    }
    // We have a target point!
}
Get the sprite from the Sprite Component. If the current entity doesn’t have a sprite component, then there’s nothing more to do and I can bail here (this set up is not ideal, as really it’s moving System responsibility into the Component, but it’ll do for now).
guard let sprite = entity?.component(ofType: SpriteComponent.self).sprite else {
    return
}
// We have something to aim at the target!
Calculate the x and y offsets between the target and the sprite’s current position:
let offset = CGPoint(x: hasTarget.x - sprite.position.x, y: hasTarget.y - sprite.position.y)
Get the length of the hypotenuse of this offset. This gives me the total distance the player sprite will travel.
let length = sqrt(Double(offset.x * offset.x + offset.y * offset.y) )
If the length is less than some arbitrarily small amount, round down to zero and say that the player sprite is at the destination so I can return early.
if length <= 0.05 {
    sprite.position = hasTarget
    return
}
Normalise the vector by dividing the x and y offset amounts by the length of the hypotenuse. This gives me the proportion of the travel that is in the x-direction and the proportion that is in the y-direction.
let normalisedVector = CGPoint(x: offset.x / CGFloat(length), y: offset.y / CGFloat(length))
Get the velocity for the current frame. This is done by multiplying the normalised vector by the movement speed (which is a property on the Movement Component that can be adjusted on a per-entity basis—for this example, it's set to 300 points per second) and multiplying that by the elapsed time since the last frame (at 60 frames per second, this would be 0.0167 seconds).
let velocity = CGPoint(x: normalisedVector.x * moveSpeedInPointsPerSecond * CGFloat(seconds), y: normalisedVector.y * moveSpeedInPointsPerSecond * CGFloat(seconds))
Get the length of the velocity vector’s hypotenuse. If this length is greater than the total length left to travel, then it means that by the next frame the character will have overshot the target. Knowing this, I can just set the character’s position to the target position and call it a day.
let velocityLength = sqrt(Double(velocity.x * velocity.x + velocity.y * velocity.y) )
if length < velocityLength {
    spriteComp.sprite.position = hasTarget
    return
}
Finally, add the velocity x and y values to the sprite's current position and get that little fella shuffling along.
let nextPos = CGPoint(x: spriteComp.sprite.position.x + velocity.x, y: spriteComp.sprite.position.y + velocity.y)
sprite.position = nextPos
Putting it all together:
class MovementComponent : GKComponent {

    func move(to target : CGPoint ) {
        self.target = target
    }

    override func update(deltaTime seconds: TimeInterval) {
        guard var hasTarget = target else {
            return
        }
        guard let sprite = entity?.component(ofType: SpriteComponent.self).sprite else {
            return
        }

        let offset = CGPoint(x: hasTarget.x - sprite.position.x, y: hasTarget.y - spriteComp.sprite.position.y)
        let length = sqrt(Double(offset.x * offset.x + offset.y * offset.y) )

        if length <= 0.05 {
            sprite.position = hasTarget
            return
        }

        let normalisedVector = CGPoint(x: offset.x / CGFloat(length), y: offset.y / CGFloat(length))

        let velocity = CGPoint(x: normalisedVector.x * moveSpeedInPointsPerSecond * CGFloat(seconds), y: normalisedVector.y * moveSpeedInPointsPerSecond * CGFloat(seconds))
        let velocityLength = sqrt(Double(velocity.x * velocity.x + velocity.y * velocity.y) )

        if length < velLength {
            sprite.position = hasTarget
            return
        }
        let nextPos = CGPoint(x: sprite.position.x + velocity.x, y: sprite.position.y + velocity.y)
        sprite.position = nextPos
    }
}
Compared to this before, with SKActions:
func move(to target : CGPoint ) {
    // Calculate the duration by getting the total distance and dividing it by the move speed
    let offset = CGPoint(x: target.x - sprite.position.x, y: target.y - sprite.position.y)
    let length = sqrt(Double(offset.x * offset.x + offset.y * offset.y) )
    let moveAction = SKAction.moveTo(x: hasTarget, duration: length / moveSpeedInPointsPerSecond)
    sprite.run(moveAction)
}
It’s clear that if one can use SKActions, one should. As it currently stands, I absolutely could for this code as doing all this manually adds nothing that we don't get for free from SKActions.
However, in Part 2, I’ll look at how scaling sprites to give the illusion of depth scuppers the use of SKActions and how having manual control allows me keep that magic alive. Then, in Part 3, I'll add pathfinding that will really make this Component earn it's keep.