Now that I’ve got Photoshop all set up, it’s time to make some (auto)magic!
I want to take any random image and cut it up using the selection tools. Then, with but a single click of the mouse, I want my script to:
- Find a layer group named “Pieces” in the active document
- Loop through each layer in this group
- Calculate the centre of that layer in Photoshop space (where 0,0 is at the top left of the document)
- Convert it to SpriteKit space (where 0,0 is at the bottom left)
- Store both the layer name and centre position in a dictionary object
- Create an array of these dictionary objects that represent all of the pieces of the puzzle
- Create a dictionary that has additional metadata about the document (e.g. whether it is raster or vector based) as well as this array of pieces
- Write out this JSON file to the same location as the Photoshop document itself
- Repeat this process for different document scales (e.g. if it’s a raster based document, then the iPhone assets will be scaled down by 50% and their centre points will be different) and write out a separate JSON file
Setting Up The Workspace
Photoshop will list out all of the scripts it finds in the /Applications/Photoshop CC 2018/Presets/Scripts folder under the File -> Scripts menu. This is a lot more convenient when developing than having to go to File -> Scripts -> Browse... and manually locate the script every time I want to run it.
By default, this folder is write protected so I first had to enable write permissions by highlighting this folder, pressing Cmd + i, then under Sharing and Permissions making sure “everyone” can read and write.
Once I have permission, I created a new file called Puzzle Piece Creator.js and then restarted Photoshop to get it to appear. For even more convenience, I then assigned a keyboard shortcut (Cmd + Alt + Shift + 1) to this new menu item.
To speed up the layer renaming, I also set up two Typinator shortcuts that asks me for a layer number and then expands as follows:
;pspr		: 	pieceX~iPad.png, 50% pieceX.png
;pspv		: 	200% pieceX@2x.png, 300% pieceX@3x.png, 400% pieceX@2x~iPad.png
(;pspr is for raster-based documents, ;pspv is for vector-based documents, and the X represents the layer number—see the previous post for more info about this naming system.)
Including Dependencies
Unfortunately, Photoshop’s version of JavaScript doesn’t have the standard JSON library (which makes it easier to convert JavaScript objects into valid JSON, and was built in to ECMAScript 5) installed by default.
I got the json2.js file from Douglas Crockford’s Github and put it in the /Applications/Photoshop CC 2018/Presets/Scripts folder
In the Puzzle Piece Creator.js file, I added an include statement at the top:
//@include json2.js
Scripting Photoshop
Photoshop is represented in JavaScript as a single app object. The properties of this object represent additional objects that correspond to different aspects of the document model in a tree structure. For example the activeDocument property is an object and contains a reference to a layers property, that itself is an array of layer objects that represent all of the layers in that document.
I’m making a few assumptions about the structure of the document:
- The document has artboards enabled
- The Pieces layer group is a child of the first artboard
A better way to do this would be to recursively loop through all the layers until the Pieces layer group is found but sometimes speed trumps elegance.
Let’s write some code!
Getting the Pieces Layer
function writeJSON( isVector, filePath, layers, scale ) {
	// To be defined
}
function createFiles( piecesGroup ) {
	// To be defined
}

// 1.
var layers = app.activeDocument.layers[0].layers;

// 2.
var piecesGroup;

// 3.
for (var i = 0; i < layers.length; i++ ) {
    var layerName = layers[i].name;

	// 4.
    if ( layerName.indexOf("Pieces") === 0 ) {
        piecesGroup = layers[i].layers;
        break;
    }
}

// 5.
createFiles(piecesGroup);
- Get all of the layers that are children of the first artboard
- Create a variable to store any layers found within the Pieces layer group
- Loop through the children of the first artboard
- If the layer name contains the word “Pieces”, then set the
piecesGroupvariable to the sublayers of this layer and break out of the loop (there should only be one Pieces group in the document) - Pass this array of layer objects to the
createFiles()function (defined below)
Defining the JSON Documents
function createFiles( piecesGroup ) {

	// 1.
	if ( piecesGroup === undefined ) {
		alert("Puzzle pieces must be placed in a layer group named 'Pieces'");
		return;
	}

	// 2.
	var Path = app.activeDocument.path;
	var iPhoneFile = Path + "/" + "pieces.json";
	var iPadFile = Path + "/" + "pieces-iPad.json";

	// 3.
	var result = confirm("Is this a vector-based document?", true);

	// 4.
	var iPadScale = 1;
	var iPhoneScale = 0.5;

	// 5.
	if (result == true) {
		iPadScale = 2;
		iPhoneScale = 1;
	}

	// 6.
	writeJSON(result, iPadFile, piecesGroup, iPadScale);
	writeJSON(result, iPhoneFile, piecesGroup, iPhoneScale);
- If the array is undefined, this means that no valid Pieces group was found. Warn me and then exit
- Get a reference to the document path and use this to define the location of the output files
- Ask me if I’m creating a vector based document tor not, as this has an effect on the final position of each piece (see previous post).
- For raster-based documents, the iPhone assets are positioned as if the document is half the size (see previous post)
- For vector-based documents, the iPad version of this document will be, in effect, double the size of the iPhone version (see previous post)
- Call the
writeJSONfunction with the relevant details (defined below)
Writing The Files
function writeJSON( isVector, filePath, layers, scale ) {

	// 1.
	if ( layers.length == 0 ) {
		return;
	}

	// 2.
	var jsonDoc = {};
	var piecesArray = [];

	// 3.
	for (var i = 0; i < layers.length; i++ ) {

		// 4.
		var layer = layers[i];
		var layerName = layer.name;

		// 5.
		if ( layerName.indexOf(".png") !== -1 ) {

			// 6.
			var nameParts = layerName.split(",");

			// 7.
			var theName = nameParts[0].replace(/([0-9]{2-3}% )?(@[0-4]*x)?(~iPhone)?(~iPad)?\.png/i, '').replace(/([0-9]{2,3}\%\s)?/i, '');

			// 8.
			var left = UnitValue(layer.bounds[0]).value * scale;
			var top = UnitValue(layer.bounds[1]).value * scale;
			var right = UnitValue(layer.bounds[2]).value * scale;
			var bottom = UnitValue(layer.bounds[3]).value * scale;

			// 9.
			var xPos = left + ((right - left) / 2 );

			// 10.
			var height = app.activeDocument.height.value * scale;
			var yPos = height - (top + (( bottom - top ) / 2 ));

			// 11.
			var prop = {};
			prop["name"] = theName;

			// 12.
			var positionArray = [];
			positionArray.push(xPos);
			positionArray.push(yPos);
			prop["position"] = positionArray;

			// 13.
			piecesArray.push( prop );
		}
	}

	// 14.
	jsonDoc["type"] = ( isVector ) ? "vector" : "raster";
	jsonDoc["pieces"] = piecesArray;

	// 15.
	var file = File( filePath );
	if(file.exists) {
		file.remove();
	}

	// 16.
	file.encoding = "UTF8";
	file.open("e", "TEXT", "????");
	file.writeln( JSON.stringify(jsonDoc) );
	file.close();
}
- Make sure that there actually layers to work with and bail out early if there isn’t. I don’t want to overwrite existing files with an empty document.
- Create the root dictionary object and the array that will hold the pieces
- Loop through each layer
- Get a reference to the layer object and the layer name
- Check that the layer has a .png extension (this confirms that it will be included in Photoshop’s asset generation—every piece in the JSON needs to correspond to an actual asset)
- Explode the layer name by comma to get a reference to a single filename
- Using the first result only, delete anything that will be ignored by Xcode’s asset catalogs (@2x/@3x/~iPad/~iPhone/.png), then delete any starting percentages used by Photoshop's asset creation (50%,200%, etc). This will give me the final name of the asset.
- Photoshop doesn’t provide the centre point information, so get references to the layer bounds, which are multiplied by the scale to adjust their position for different device sizes
- Calculate the x value of the centre point by calculating the width, halving it, then adding back the left edge of the layer
- Calculate the y value of the centre point by first getting the height, which is the bottom value minus the top value (as Photoshop’s y-axis runs from the top). Halve this value, then add back on the top value to get the centre point. Finally, get the full height of the document (with the scale applied) then minus the centre point y-value to flip it so that it works in SpriteKit’s co-ordinate space (where the y-axis starts at the bottom).
- Create a dictionary and set the layer name to the “name” key
- CGPoint’s Codable implementation expects an array of two numbers, so I create an array object and add the xPos and yPos to it, then assign this to the “position” key
- This new piece dictionary is added to the array of pieces
- Outside of the loop, add some metadata detailing the document type (as this will affect the SpriteKit scene size) and then add the pieces array to the root dictionary object
- Get a reference to a File object then remove any existing file as I want to overwrite it
- Set the encoding, open the file reference for writing, use the JSON library’s
stringify()function to turn the root dictionary object into a plain text JSON string, then close the file
Creating my First Puzzle
With all that in place, it’s time to test it out!
I took the following illustration, placed it within the active 4:3 region of the 19.5:9 iPhone X document template, then cut it up into the following layers:
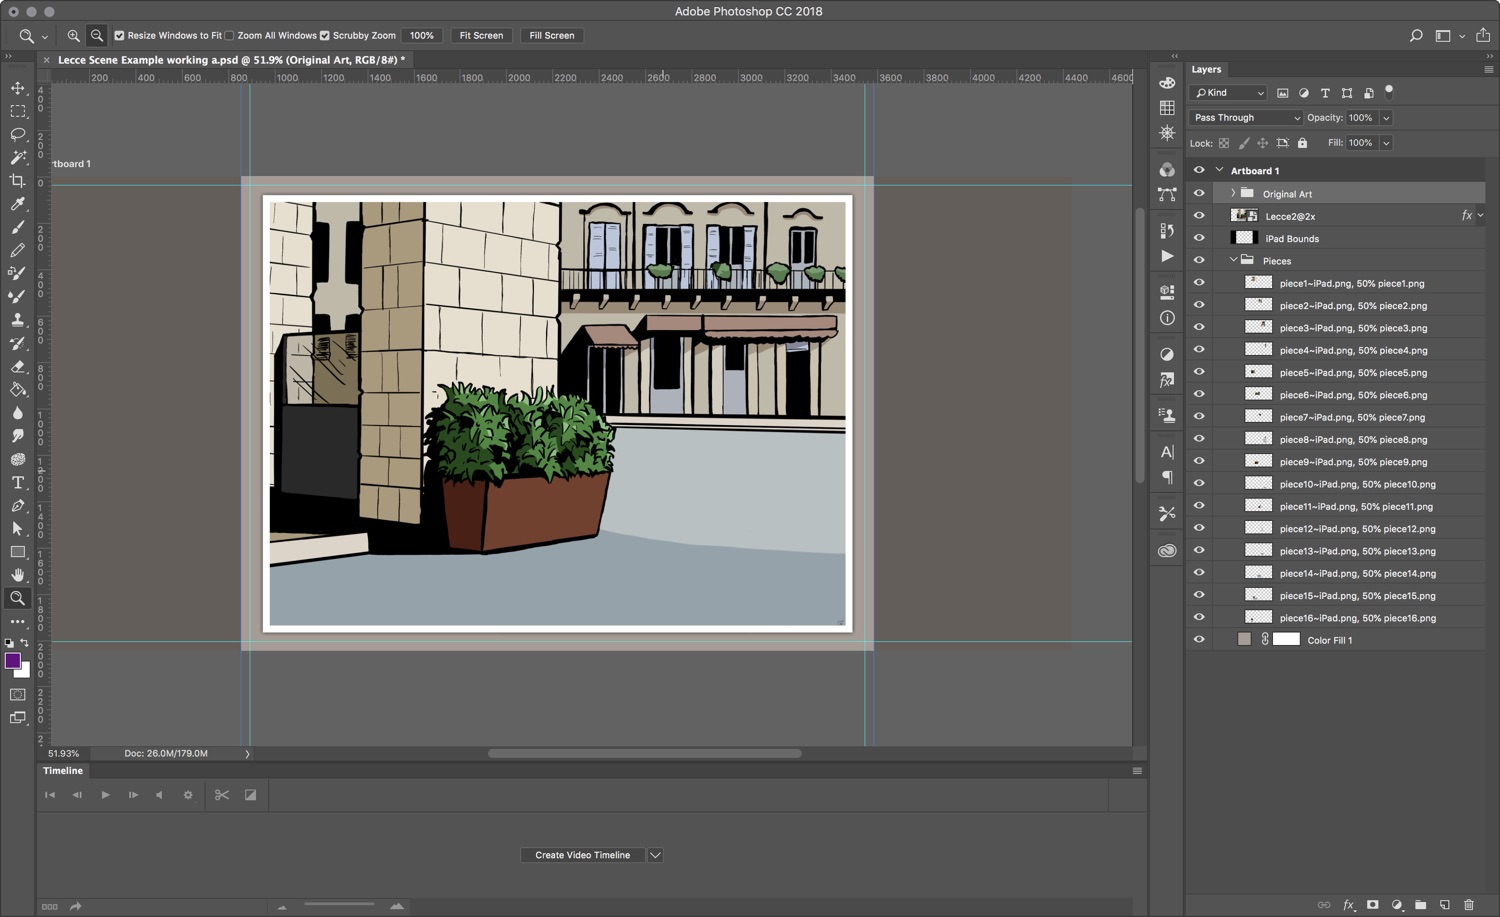
Turn on Asset generation by going to File -> Generate Assets, mash the keyboard shortcut (Cmd + Option + Shift + 1) and it asks me if this is a vector document, which in this case it isn’t. Click no and I’m done!
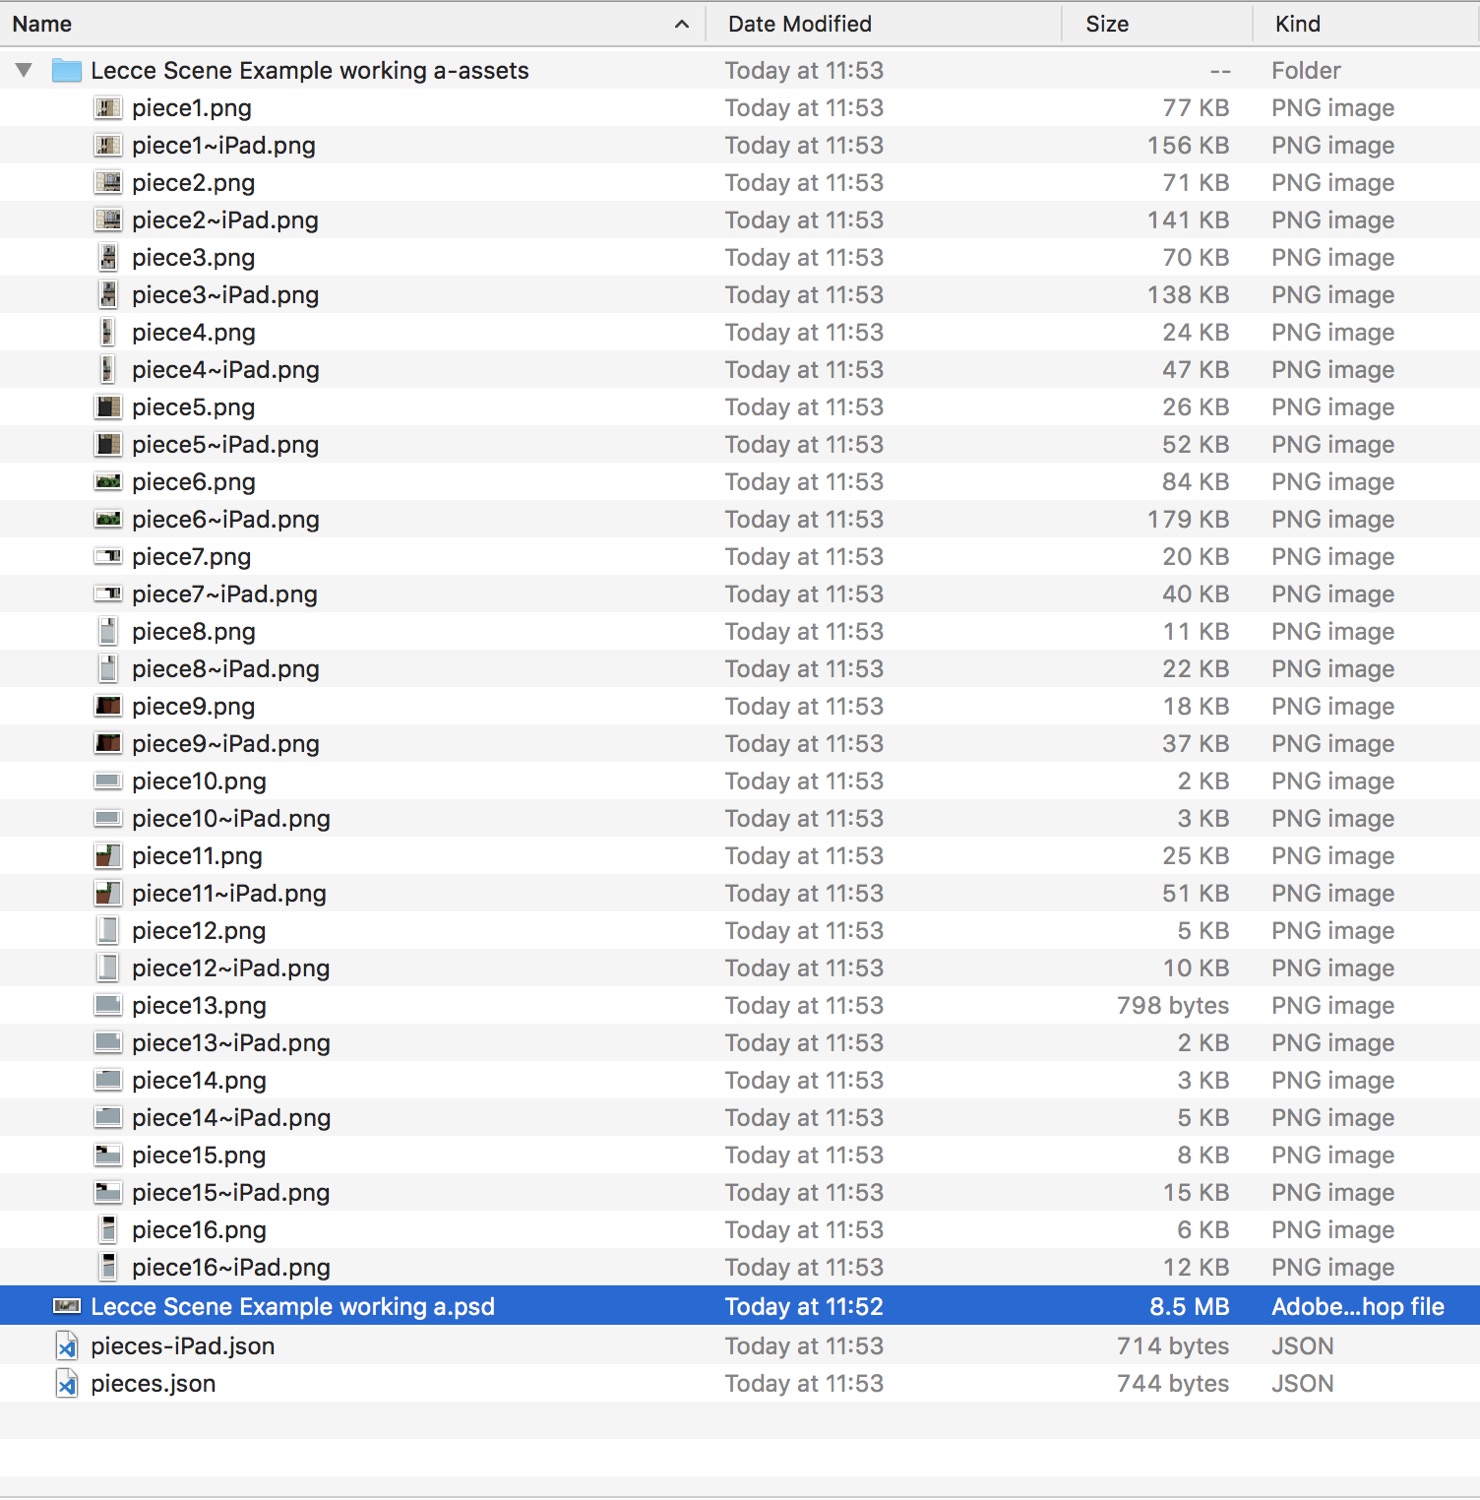
There are now two JSON files, one for iPad and one for iPhone, as well as a subfolder full of the actual images:
And here’s the output of the corresponding iPhone JSON files:
{"type":"raster","pieces":[{"name":"piece1","position":[721,796]},{"name":"piece2","position":[1179,828.5]},{"name":"piece3","position":[1481.25,742.75]},{"name":"piece4","position":[1689,807.5]},{"name":"piece5","position":[634.75,458.25]},{"name":"piece6","position":[994.25,513.75]},{"name":"piece7","position":[1158.25,580.25]},{"name":"piece8","position":[1617.5,386]},{"name":"piece9","position":[921.5,308]},{"name":"piece10","position":[1640,90.25]},{"name":"piece11","position":[1197.75,368.75]},{"name":"piece12","position":[1380,349.25]},{"name":"piece13","position":[1403.25,116.75]},{"name":"piece14","position":[1133.5,136.25]},{"name":"piece15","position":[801,174]},{"name":"piece16","position":[540.75,174]}]}
Success! Now all this stuff needs is an Xcode project to be dragged in to…