I have spent the last few weeks learning about animating in After Effects with the powerful Duik Bassel plugin by following Jake Bartlett’s amazing video series on Skillshare.
I think I now have a firm grasp of how basic rigging works in Duik and I wanted to summarise it here in case future me forgets the details (likelihood: high).
Preparing Artwork
There are two main methods of animating in After Effects: rubber hose-style animation using puppet pins and rigid limbs.
Rubber Hose
This is the more “cartoony” style (think Adventure Time). The arms and legs don’t need to be subdivided (e.g. into arm and forearm or thigh and calf) as they will have bendy deformations applied in After Effects with the puppet tool.
Rigid Body
Everything that needs to be moved separately should be on its own layer (e.g. upper arm and forearm should be separated).
For more flexibility when animating, pins can also be added to joints on a rigid body animation to enable stretching out of the limbs.
The chest and belly should also be separated too for better flexibility and more realistic motion. Alternatively, pins and bones can be added to a single torso piece and that could be used to bend the torso instead.
Drawing Joints
Whichever method is chosen, the joint areas of the drawing should be as circular as possible as this will make for cleaner, more believable rotations around those joints.
Whenever one part of the drawing is stacked underneath another part, the lower part needs to have additional art around the circle of the joint.
This additional area will appear when the art rotates (e.g. if the hand is below the forearm in the layer stack, the hand will need to have a circle at the wrist):
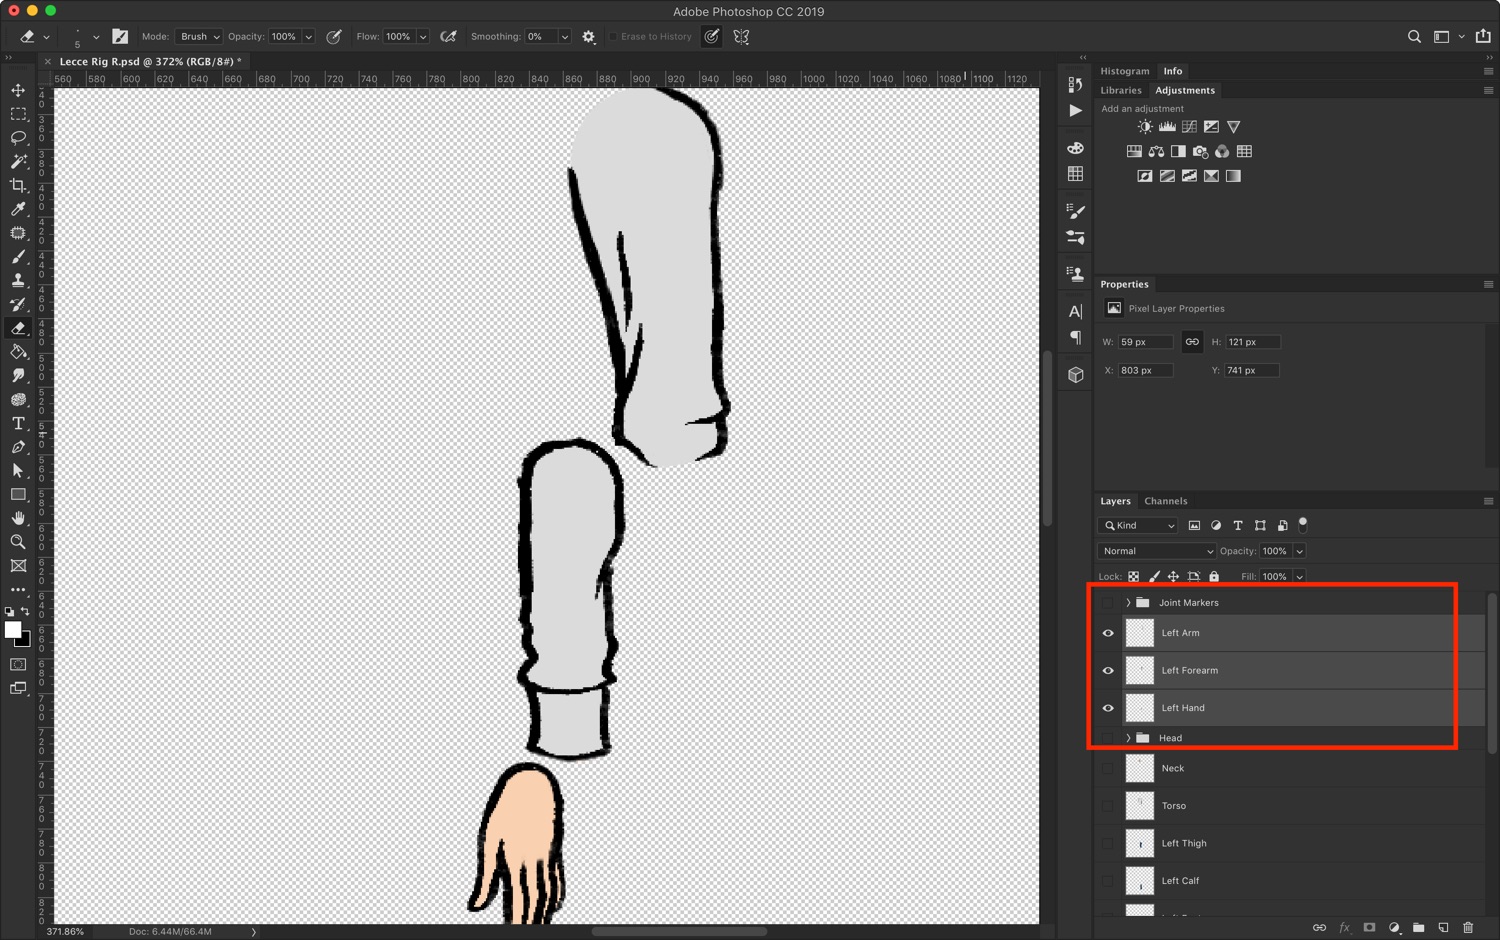
The circular regions of the joints should be copied and be made into brightly coloured joint guides that match these circles on the artwork.
For Photoshop files, these joint guides can be in their own group and AE will snap The structure joints to the centre of the guides just fine.
For Illustrator, once the art is imported, right click on the joint guides layer in AE and then selected Create -> Create Shapes from Vector Layers in the context menu. This will pull out the joint guides and convert them to vector shapes within AE and will allow the snapping.
To snap the structure joints to the artwork joint guides, hold command while dragging the structure joints.
Structures in Duik
Create structures that match the layers in the drawings. If I’m doing a rigid body and my torso isn’t separated into two parts (belly and upper torso), then I probably don’t need two spine positions. However, it’ll be a lot more flexible and create more realistic animations if I do separate them.
The other option is to create bones from a single torso image (for example) and parent these bones to the spine structures. Rigid bodies and puppet pins/bones can be combined in the same animation.
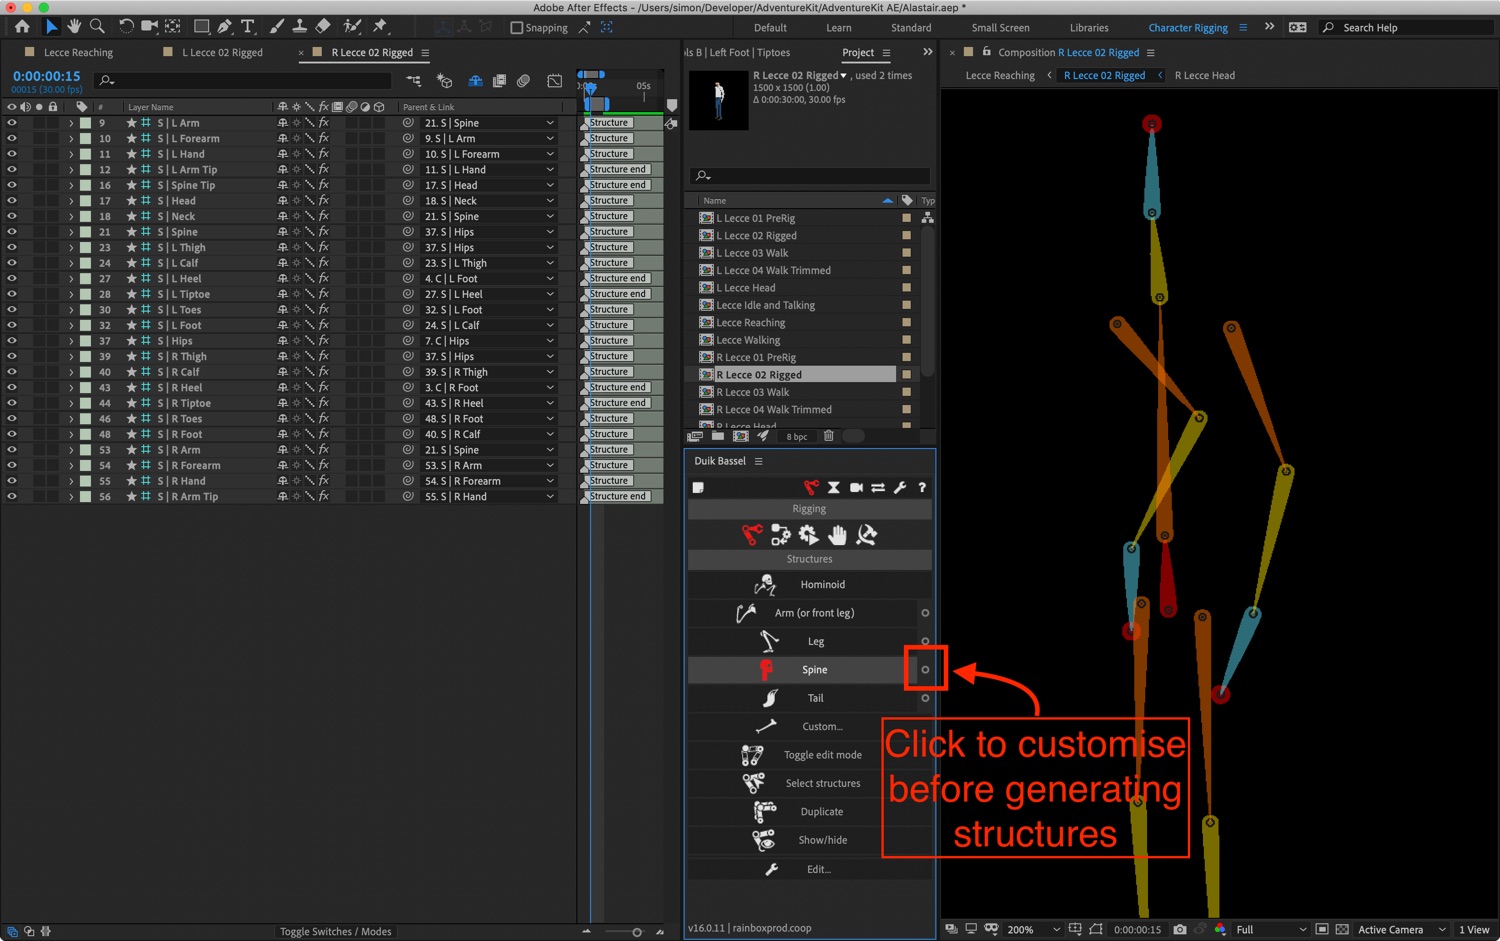
Structures can be customised and it’s possible to create things like tails or many-limbed characters.
Click the gear icon next to the relevant structure part in the Duik plugin to edit the structure part before clicking the Hominoid button.
Pins, Bones, Rigid Art, Oh my!
If I have an arm, say, with a separate hand, then I’ll need three pins. One for the shoulder, one for the elbow, and one for the wrist. These will need to be parented to the upper arm, lower arm, and hand structures. The artwork for the hand will also need to be parented to the hand structure.
The torso will need to have as many pins as there are spine elements, usually hips, pelvis, shoulders, and neck.
However, it will also need additional pins at the left and right shoulders and hips where the arms attach. These bones will then need to be parented to the arm/leg structures as well so that the body all moves together.
Rigid structures don’t require this, and the individual pieces of the artwork can be directly attached to the structure.
Basically, pins/bones stand in for unseparated artwork.
The torso art should be parented the hip bone.
Creating Bones From Pins
Step-by-step notes:
- Use circular joint markers in original artwork to make it easier to line up structures.
- In AE, create the structures using the relevant tool in the Duik plugin then line the joints of these structures to the centre of the joint markers
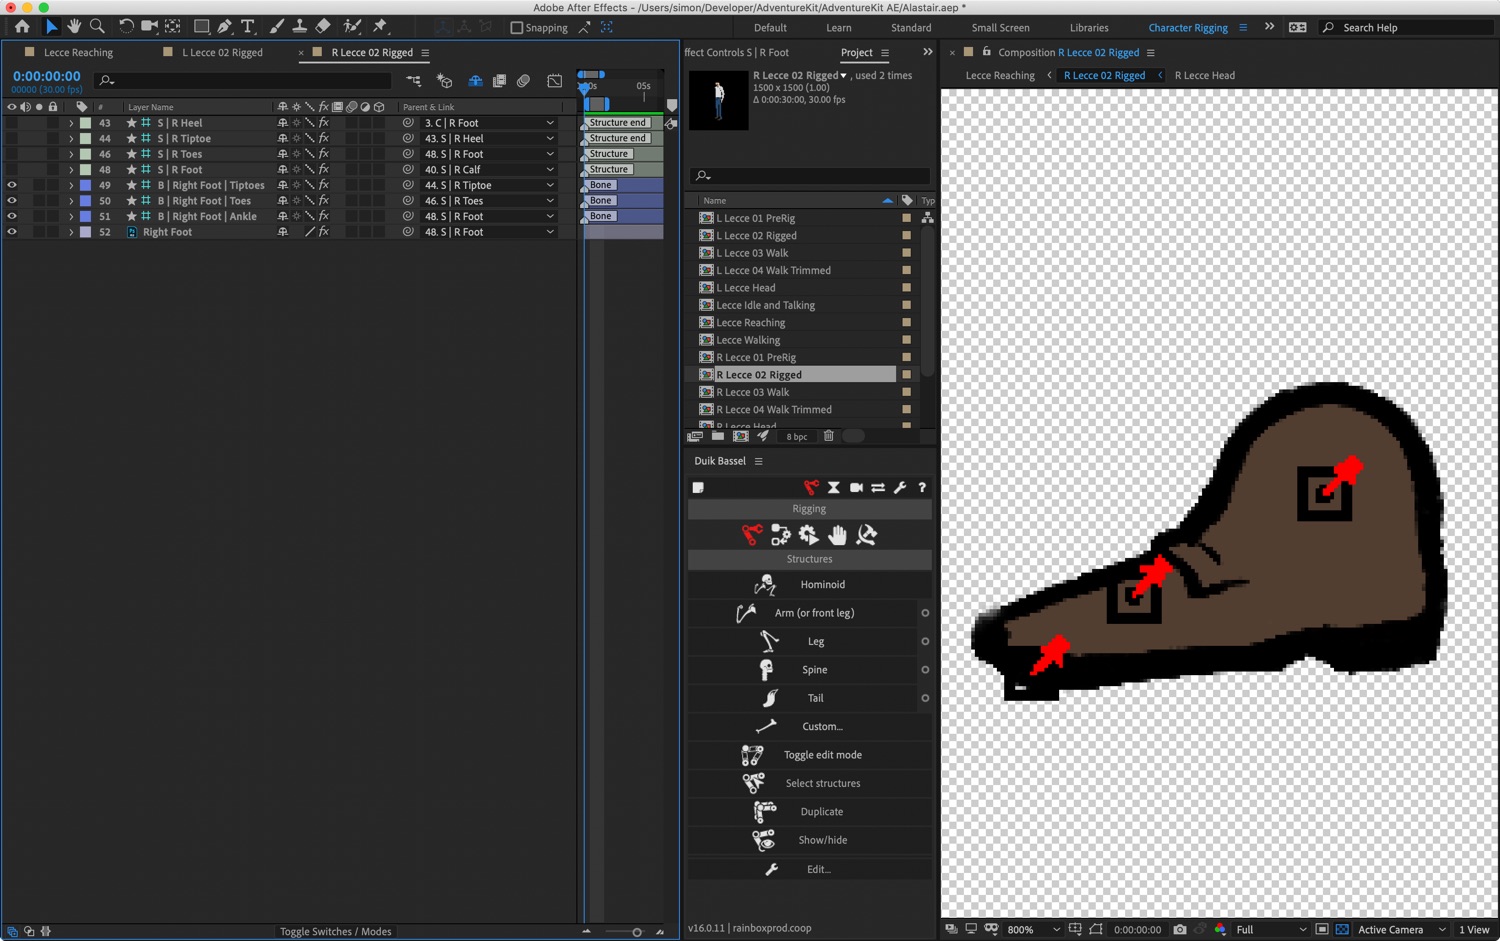
- Select the artwork, then select the pin tool. Make sure that the mesh expands beyond the edges of the artwork (
show mesh). Create pins exactly in the centre of the joints of the structure (there are little circles in these joints, zoom in close). - In the pin effect of the artwork layer, make sure “Use Legacy Engine” is selected.
- Probably rename the pins to something clearer (naming them after the joint—”elbow”, “knee”, etc.—is usually a good idea).
- Make sure the artwork is selected, then click “Create Bones” in Duik.
- Using the pickwhip, make these bones children of the relevant parts of the structure.
- Make sure the art is attached correctly as well, usually to the root of the structure (e.g. the arm artwork would be attached to the layer named “Arm”, not “Forearm”)
The torso requires special consideration. It needs additional left and right shoulder and hip pins on the torso art itself.
When the bones are created, these need to be parented to the roots of their relevant structures (e.g. the right shoulder bone should be parented to the right arm). This keeps the structure together when animating.
Additional Notes
Select only the structures, then select Auto IK to create the controllers.
Once the controllers are created, select everything except the hips and click the Zero button in Duik. This will zero out all of the artwork which will make it easier to return things to a neutral pose.
The more controllers and structures there are, the slower things are to render.
It’s possible to pull out the controls from other compositions (e.g. head and mouth controls) and have them in the same composition as the main rig, although this will slow AE down significantly.
It’s a good idea to duplicate the compositions before any major changes are made:
- After all the structures are in place and the joints are aligned but before the auto-IK is applied
- After the controllers are set up and zeroed but before any auto-animation scripts are applied (e.g. the walk cycle)
Layer Fatigue
Duik is an immensely powerful plugin but it does require a lot of layers. It does a good job of grouping and colour coding the layers, however.
Clicking on the layer colour in After Effects offers an easy way to select all the layers in that group. With all the layers selected, clicking on layer icons like the lock, shy, and visibility will change all of the selected layers at once.
A good starting point:
- Controllers (layer name begins with
C|): visible, not shied, not locked - Artwork: visible, shied, locked
- Bones (
B|): invisible, shied, locked - Structures (
S|): invisible, shied, locked
When animating, only the controllers need to be visible unless you’re using other precompositions to control other aspects of the rig (e.g. the head).
Try not to be intimidated by the number of layers. It’s a good idea to start with something small like just an arm and get that all rigged up to an idea about how it all works.
I highly recommend working through Jake Bartlett’s Skillshare course. It’s relatively short but comprehensive and easy to understand. It also comes with all of the artwork needed to follow along and he walks you through setting up a rig from Illustrator using vector-based art as well as from Photoshop.
In addition, he has a free YouTube video where he goes in to more detail about rigging up additional controls for things like head motion, lip sync, and blinking.
The developer of Duik has a Patreon page as well. This plugin is amazing and yet it’s entirely free so if you can afford it, join me and chuck a buck or two into the pot every month.